

Shopping & custom lists
Los artículos de ayuda solo están disponibles en inglés por ahora.
Lists are Plannie's shared notebook: groceries, to-dos, packing lists, project plans. Everyone in the family sees the same lists and can check things off. Lists are free for every household.
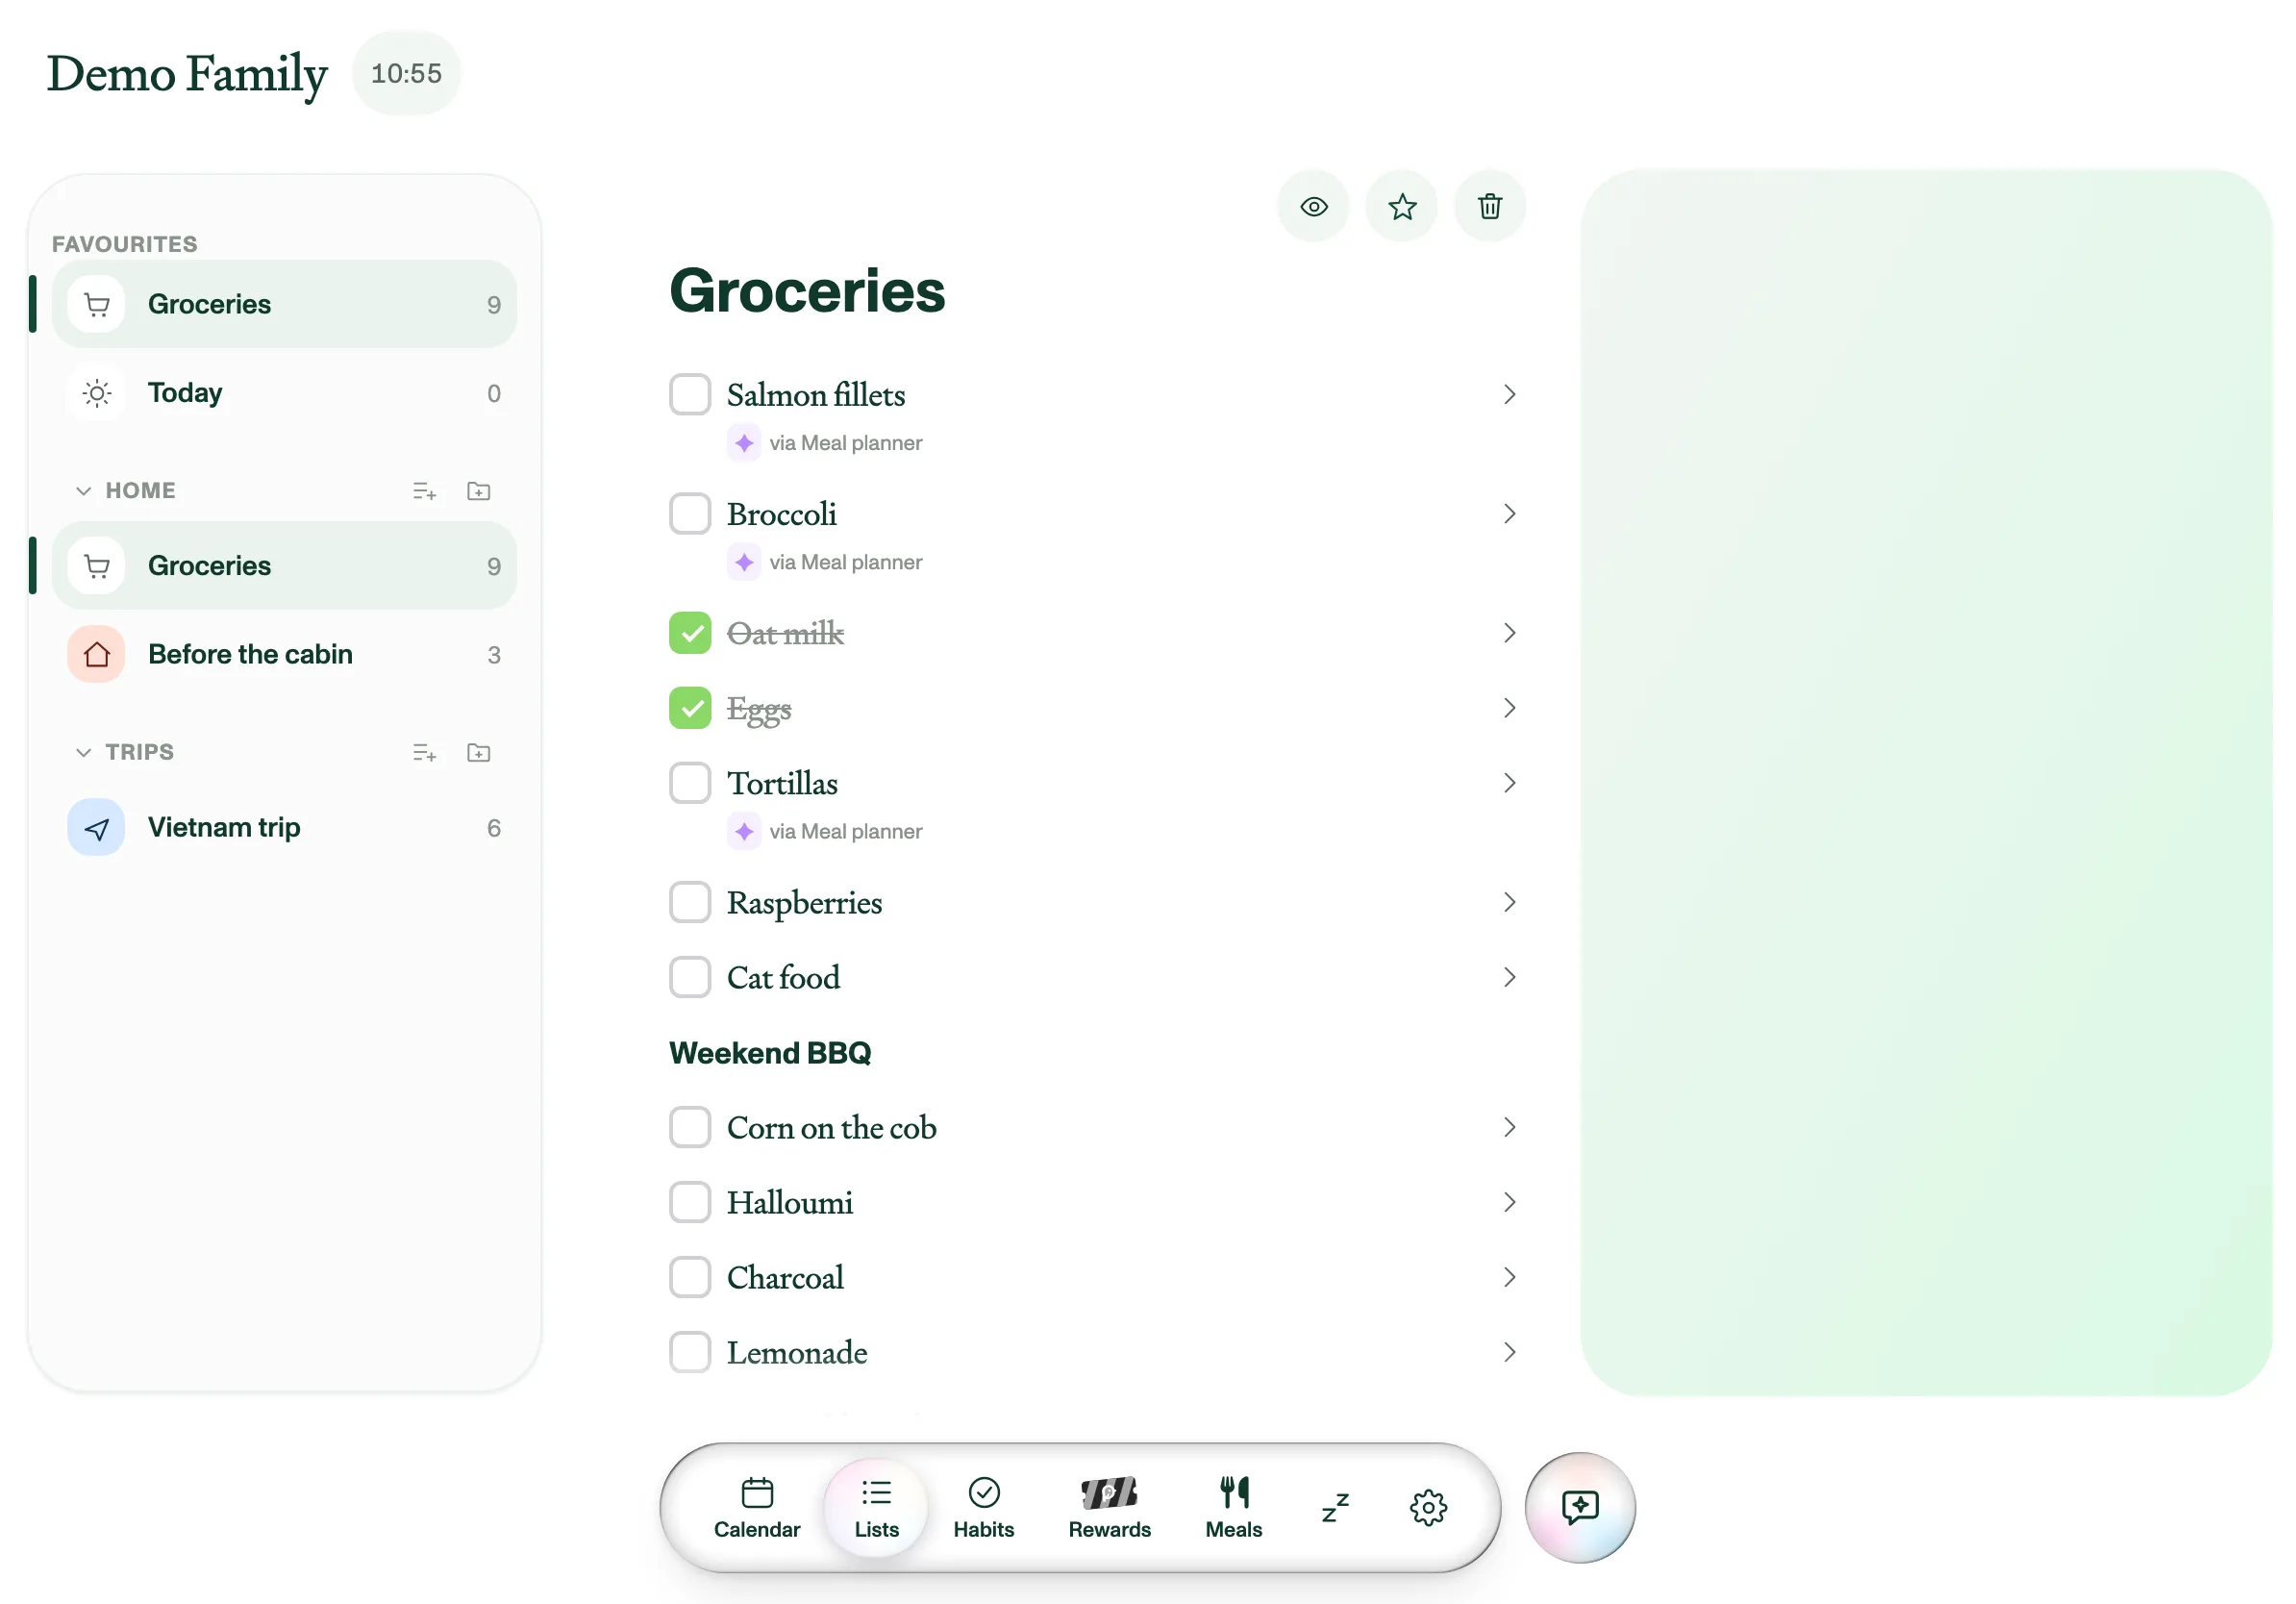
The layout
- Left: your lists, grouped into sections, with Favourites and a Today view pinned on top.
- Middle: the open list. It's built from blocks (tasks, headings, paragraphs, dividers) and supports nesting, so a list can be as simple or as structured as you like.
- Right: the list's cover and details for a selected task.
- On a phone the panes stack: tap a list and it opens full-screen, with its cover running full-width across the very top, about a quarter of the screen deep. The cover drifts up and shrinks as you scroll until it sits behind the toolbar buttons. Swipe right anywhere to go back to your lists; the same swipe closes a task's details.
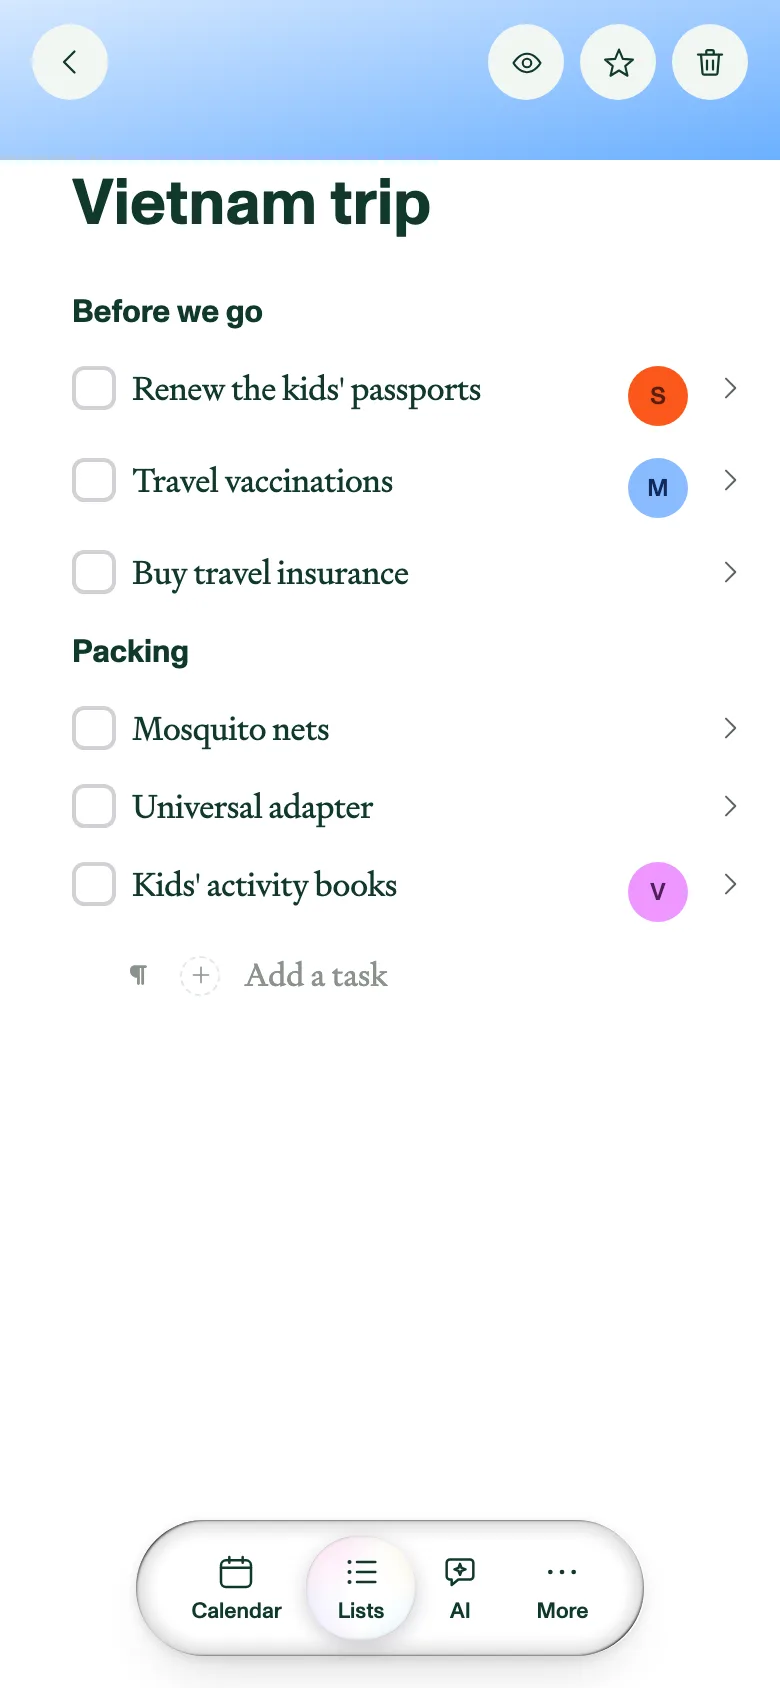
Working with tasks
Check off a task and it pops, with a little bell to go with it, one of four picked at random so it doesn't get repetitive. Unchecking is silent, and the bell follows your device's silent switch or ringer, so it stays quiet when your device is. Tasks can carry a due date and be assigned to one or more members. The Today view automatically gathers everything due today or tomorrow across all lists, tagged with the list it came from.
Assign a task to more than one person. Open the task's details and tap its assignee chip. The picker is multi-select, so tap everyone who's on it, then Done; Clear unassigns the lot. A task with one assignee shows that person's avatar on its row; with two or more, the row shows a stack of the first three avatars and a small +N count for anyone beyond them.
On a list the whole family shares, checking a task off also puts a small grey Done by plus that person's name next to it, so it's clear who got to it. Your personal lists don't show it, and the attribution never gets struck through along with the task. Ticks made on a shared family screen are the exception: a device set to kiosk mode is tapped by whoever walks past, so Plannie won't guess a name. The task is simply marked done, and re-checking it there clears a name it already had.
New rows come from the Add a task row at the bottom: the + on its right opens it for typing. In a desktop browser, the ¶ button to the left chooses the block type, and picking a type adds that block straight away. On a tablet or phone there's no type button. Instead, whenever you're typing in a row, a formatting bar sits just above the keyboard: tap it to turn that row into a task, heading or paragraph, or to drop in a divider.
Enter saves the row and opens a new one below it, unless your cursor is at the very start of the row, in which case it pushes that row down and opens an empty one above it instead.
List housekeeping
- Tap a list's title to rename it; star it to add to Favourites. A starred list moves into the Favourites group at the top instead of showing up twice — un-star it and it drops straight back into its section, in the same place it was before. While it sits in Favourites it can't be dragged to a new spot; un-star it first. Who the star applies to depends on the device: on one in personal mode your favourites are yours alone and follow you to your other personal devices, while a kiosk — the shared family screen — keeps one set of favourites for everyone.
- Hide or show completed items from the list toolbar.
- Delete a row: swipe it left on a tablet or phone. In a browser, hover the row and pick Delete from its block-type menu.
- Delete a divider: press Backspace on the empty row just below it, one press per divider. For a divider at the very end of the list, do it from the Add a task row.
- Deleting a list asks for confirmation; it removes the list and its tasks. Swipe the list left on a tablet or phone; in a browser, hover it and click the trash that replaces its count. An empty section is deleted the same way.
- Give a list a cover from Customize list: upload a photo, search Pexels, or leave it as a gradient. Picking a colour there restyles the gradient and the list's icon; it never replaces a photo you've already set. The photo in use shows as a thumbnail under Upload / Search Pexels, with Remove photo to clear it and go back to the gradient. On a wide tablet or in a browser, Customize list is the gear on the cover in the right-hand pane. On a phone or a narrower tablet there's no cover pane, so it's the gear in the list toolbar instead (first of the buttons, before hide-completed, star, the shopping cart and trash) and it opens as a sheet from the bottom — with Hide cover in it as well, since the phone cover has no buttons of its own. Hiding it removes the cover from the top of the list; the same button then reads Show cover.
Lists without a connection
A list you've opened on a device is also kept on that device, so it still opens straight away with no internet connection. Keep editing it as normal: what you change is saved on the device right away, even if you leave the list, switch apps or close Plannie, and as soon as you're back online it syncs, merging with anything the rest of the family changed in the meantime. Signing out clears these copies from the device.
Shopping mode on iPhone
Out at the shops? Open the list and tap the cart in its toolbar — it's there whenever the open list still has something to check off — and the list comes with you: on the Lock Screen, in the Dynamic Island, in StandBy while the phone charges on its side, and on an Apple Watch's Smart Stack. Tick items off right there, without unlocking the phone or opening Plannie, and the rest of the family sees them go at once. Anything they add while you're out turns up on the card too.
The card lists the first few unchecked items with N of M left beside the list's name, a count of whatever didn't fit, and the assignee's initial on rows that have one. Tick the lot and it reads "Nothing left — nice."
While shopping mode is running, the cart in the toolbar sits on a tinted disc, so you can tell at a glance which list is out with you; starting and stopping it also flash a brief confirmation in the app, since the card itself turns up on the Lock Screen rather than on screen. Tap the cart again, or Done shopping on the card, to finish. Shopping mode also ends on its own eight hours after it started, if you sign out of Plannie on that phone, and if the list it's showing is deleted. A card that has run past its eight hours dims until iOS clears it, so you can see at a glance that it's no longer live. If tapping the cart tells you Live Activities are off, switch them back on for Plannie in the phone's Settings.
You can start it without opening the app as well: on iOS 18 or later, add the Add to Plannie control to Control Center, the Lock Screen or the Action button and set it to Start shopping, and it starts shopping mode for your first Favourites list, otherwise your first list.
Sync a list with Apple Reminders
A list can be linked to a list in Apple Reminders, so tasks added, edited, checked off or deleted on either side show up on the other. Linked lists carry a small link badge next to their name — in your lists on the left and at the top of the list itself — on every device, including Android and the web. See Sync a list with Apple Reminders.
Let the Assistant do the typing
"Put milk and eggs on the groceries list": Plannie Assistant adds items to any list by name, and the meal planner can generate a grocery list from the week's meals. On an iPhone or iPad, Siri works too: "Add to a list in Plannie", or "Make a new list in Plannie". See Using Plannie with Siri.